
环境搭建
1.搭建一个springboot项目。
2.pom引入,mq所需jar包。
<!--rabbitMQ-->
<dependency>
    <groupId>org.springframework.boot</groupId>
    <artifactId>spring-boot-starter-amqp</artifactId>
</dependency>
3.yaml配置
spring:
  rabbitmq:
    host: 127.0.0.1 # rabbitmq的连接地址
    port: 5672 # rabbitmq的连接端口号
    username: username # rabbitmq的用户名
    password: password # rabbitmq的密码
普通模式
简单模式是最简单的消息模式,它包含一个生产者、一个消费者和一个队列。生产者向队列里发送消息,消费者从队列中获取消息并消费。
声明一个队列
@Configuration
public class RabbitConfig {
  //申明第一个队列
  @Bean
  public Queue helloQueue() {
    return new Queue("hello");
  }
}
创建一个生产者(发送者)
@Component
public class SenderConfig {
    @Resource
    private AmqpTemplate rabbitTemplate;
    //创建消息发送者
    public void send() {
        String context = "普通模式发送的消息";
        System.out.println("普通模式发送者: " + context);
        this.rabbitTemplate.convertAndSend("hello", context);
    }
}
创建一个消费者(接受者)
@Component
public class ReceiverConfig {
    //创建消息接收者
    @RabbitListener(queues = "hello")
    @RabbitHandler
    public void process1(String hello) {
        System.err.println("普通模式消费者: " + hello);
    }
}
测试
@SpringBootTest
public class RabbitDemoApplicationTests {
    @Resource
    private SenderConfig senderConfig;
    @Test
    public void contextLoads() {
       senderConfig.send();
    }
}
运行结果

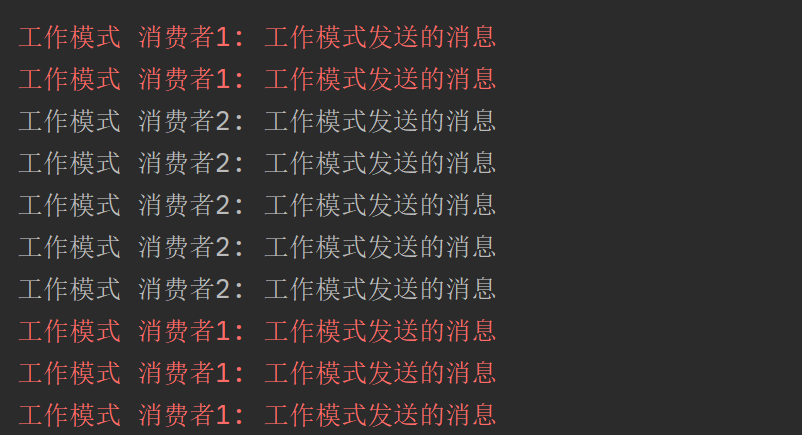
工作模式
工作模式是指向多个互相竞争的消费者发送消息的模式,它包含一个生产者、两个消费者和一个队列。两个消费者同时绑定到一个队列上去,当消费者获取消息处理耗时任务时,空闲的消费者从队列中获取并消费消息。
公平发放
声明一个新的队列,防止混淆。公平发放,能让效率高的消费的接受更多消息,举个例子,如果消费者一启动一个线程sleep(10000),那么这时候肯定就是消费者二效率高!
    //申明一个工作模式队列
    @Bean
    public Queue workQueue() {
        return new Queue("work");
    }
创建一个生产者(发送者)
    //创建消息发送者
    public void sendToWork() {
        String context = "工作模式发送的消息";
        System.out.println("工作模式发送者: " + context);
        this.rabbitTemplate.convertAndSend("work", context);
    }
创建俩个消费者(接受者)
    //创建消息接收者
    @RabbitListener(queues = "work")
    @RabbitHandler
    public void process2(String work) throws InterruptedException {
        //Thread.sleep(20000);
        System.err.println("工作模式 消费者1: " + work);
    }
    @RabbitListener(queues = "work")
    @RabbitHandler
    public void process3(String work) {
        System.out.println("工作模式 消费者2: " + work);
    }
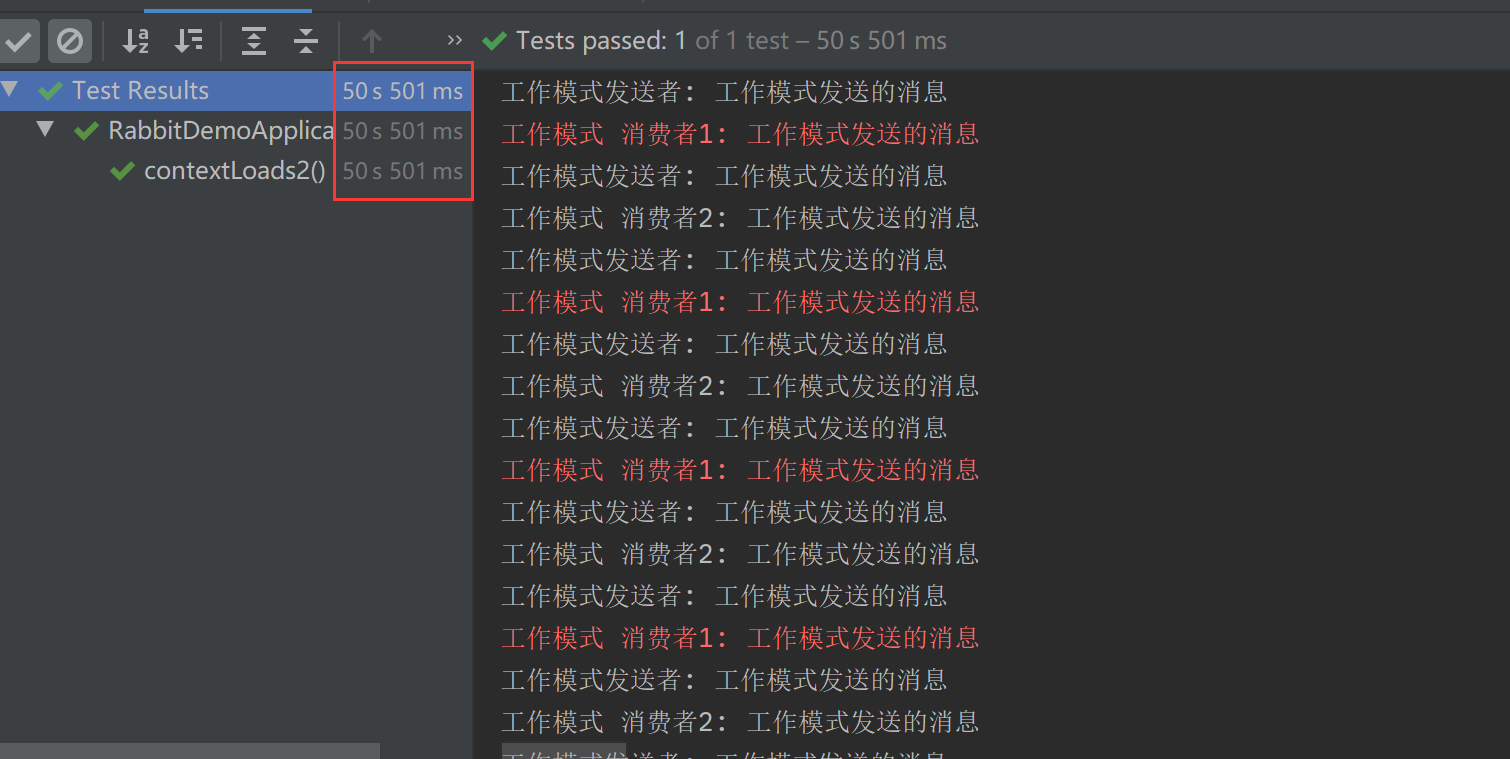
运行
    @Test
    public void contextLoads2() {
        for (int i = 0;i<10; i++){
            senderConfig.sendToWork();
        }
    }
上边说到了公平发放,能者多劳,现在说一下轮训发放,效率没有公平发放高。
轮训发放
发送方式改为有序即可:
this.rabbitTemplate.convertSendAndReceive("work", context);
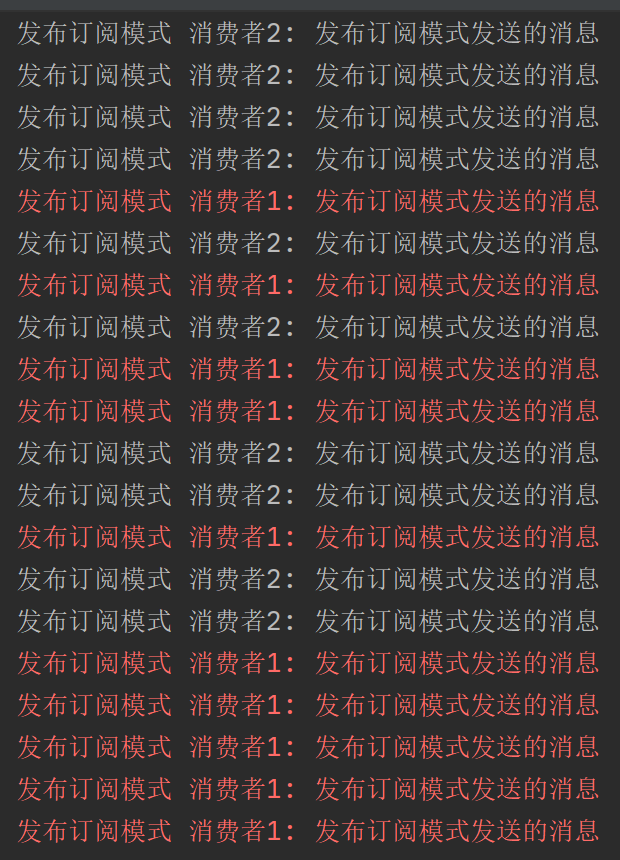
发布订阅模式
发布/订阅模式是指同时向多个消费者发送消息的模式(类似广播的形式),它包含一个生产者、两个消费者、两个队列和一个交换机。两个消费者同时绑定到不同的队列上去,两个队列绑定到交换机上去,生产者通过发送消息到交换机,所有消费者接收并消费消息。
声明交换机和队列
    //申明俩个发布订阅模式的交换机
    @Bean
    public FanoutExchange fanout() {
        return new FanoutExchange("exchange.fanout");
    }
    //申明俩个发布订阅模式队列
    @Bean
    public Queue fanoutQueue1() {
        return new Queue("fanout1");//队列一
    }
    @Bean
    public Queue fanoutQueue2() {
        return new Queue("fanout2");//队列二
    }
    //将队列一绑定到交换机
    @Bean
    public Binding fanoutBinding1(FanoutExchange fanout, Queue fanoutQueue1) {
        return BindingBuilder.bind(fanoutQueue1).to(fanout);
    }
    //将队列二绑定到交换机
    @Bean
    public Binding fanoutBinding2(FanoutExchange fanout, Queue fanoutQueue2) {
        return BindingBuilder.bind(fanoutQueue2).to(fanout);
    }
创建生产者(发送者)
    //创建消息发送者
    public void sendToFanout() {
        String context = "发布订阅模式发送的消息";
        System.out.println("发布订阅模式发送者: " + context);
        this.rabbitTemplate.convertAndSend("exchange.fanout", "",context);
    }
创建消费者(接收者)
    @RabbitListener(queues = "fanout1")
    @RabbitHandler
    public void process4(String fanout) {
        System.out.println("发布订阅模式 消费者1: " + fanout);
    }
    @RabbitListener(queues = "fanout2")
    @RabbitHandler
    public void process5(String fanout) {
        System.out.println("发布订阅模式 消费者2: " + fanout);
    }
运行
    @Test
    public void contextLoads3() {
        for (int i = 0;i<10; i++){
            senderConfig.sendToFanout();
        }
    }
路由模式
路由模式是可以根据路由键选择性给多个消费者发送消息的模式,它包含一个生产者、两个消费者、两个队列和一个交换机。两个消费者同时绑定到不同的队列上去,两个队列通过路由键绑定到交换机上去,生产者发送消息到交换机,交换机通过路由键转发到不同队列,队列绑定的消费者接收并消费消息。
声明交换机和队列
//声明路由模式交换机
    @Bean
    public DirectExchange direct() {
        return new DirectExchange("exchange.direct");
    }
    //申明俩个路由模式队列
    @Bean
    public Queue directQueue1() {
        return new Queue("direct1"); //队列一
    }
    @Bean
    public Queue directQueue2() {
        return new Queue("direct2"); //队列二
    }
    //将队列队列一绑定到交换机
    @Bean
    public Binding directBinding1a(DirectExchange direct, Queue directQueue1) {
        return BindingBuilder.bind(directQueue1).to(direct).with("orange");
    }
    @Bean
    public Binding directBinding1b(DirectExchange direct, Queue directQueue1) {
        //
        return BindingBuilder.bind(directQueue1).to(direct).with("black");
    }
    //将队列队列二绑定到交换机
    @Bean
    public Binding directBinding2a(DirectExchange direct, Queue directQueue2) {
        return BindingBuilder.bind(directQueue2).to(direct).with("green");
    }
    @Bean
    public Binding directBinding2b(DirectExchange direct, Queue directQueue2) {
        return BindingBuilder.bind(directQueue2).to(direct).with("black");
    }
创建生产者(发送者)
    //创建消息发送者
    public void sendToDirect() {
        String context = "路由模式发送的消息";
        System.out.println("路由模式发送者: " + context);
        //走black路由
        this.rabbitTemplate.convertAndSend("exchange.direct", "black",context);
        //走orange路由
        // this.rabbitTemplate.convertAndSend("exchange.direct", "orange",context);
        //走green路由
        // this.rabbitTemplate.convertAndSend("exchange.direct", "green",context);
    }
创建消费者(接收者)
    @RabbitListener(queues = "direct1")
    @RabbitHandler
    public void process6(String direct) {
        System.err.println("路由模式 消费者1: " + direct);
    }
    @RabbitListener(queues = "direct2")
    @RabbitHandler
    public void process7(String direct) {
        System.out.println("路由模式 消费者2: " + direct);
    }
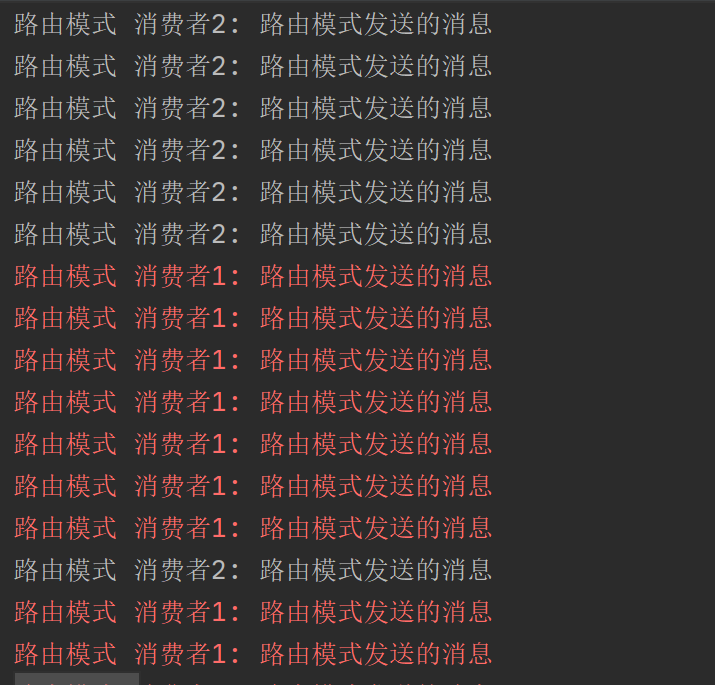
运行
  //路由模式
    @Test
    public void contextLoads4() {
        for (int i = 0;i<10; i++){
            senderConfig.sendToDirect();
        }
    }
不同的路由自己试一下。
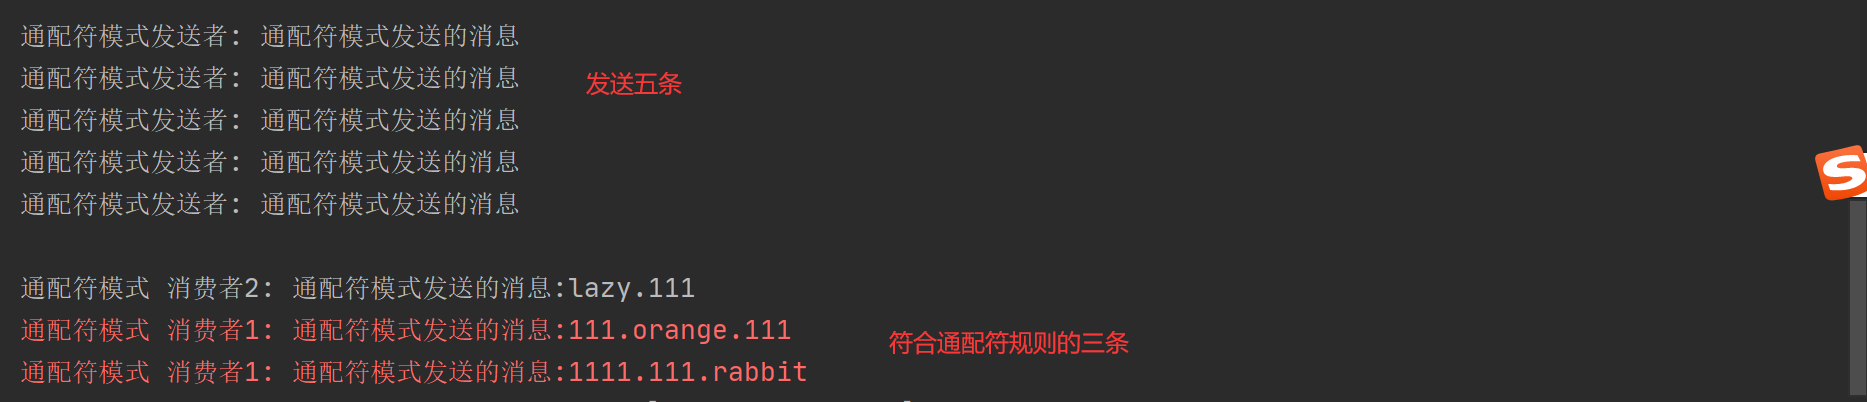
通配符模式
通配符模式是可以根据路由键匹配规则选择性给多个消费者发送消息的模式,它包含一个生产者、两个消费者、两个队列和一个交换机。两个消费者同时绑定到不同的队列上去,两个队列通过路由键匹配规则绑定到交换机上去,生产者发送消息到交换机,交换机通过路由键匹配规则转发到不同队列,队列绑定的消费者接收并消费消息。
- *:只能匹配一个单词;
- #:可以匹配零个或多个单词。
声明交换机和队列
    //声明通配符模式交换机
    @Bean
    public TopicExchange topic() {
        return new TopicExchange("exchange.topic");
    }
    //声明俩个通配符模式队列
    @Bean
    public Queue topicQueue1() {
        return new Queue("topic1");//队列一
    }
    @Bean
    public Queue topicQueue2() {
        return new Queue("topic2");//队列二
    }
    //将队列队列一绑定到交换机
    @Bean
    public Binding topicBinding1a(TopicExchange topic, Queue topicQueue1) {
        return BindingBuilder.bind(topicQueue1).to(topic).with("*.orange.*");
    }
    @Bean
    public Binding topicBinding1b(TopicExchange topic, Queue topicQueue1) {
        return BindingBuilder.bind(topicQueue1).to(topic).with("*.*.rabbit");
    }
    //将队列队列二绑定到交换机
    @Bean
    public Binding topicBinding2a(TopicExchange topic, Queue topicQueue2) {
        return BindingBuilder.bind(topicQueue2).to(topic).with("lazy.#");
    }
创建生产者(发送者)
    //创建消息发送者
    public void sendToTopic(String index) {
        String context = "通配符模式发送的消息";
        System.out.println("通配符模式发送者: " + context);
        this.rabbitTemplate.convertAndSend("exchange.topic", index,context+":"+index);
    }
创建消费者(接收者)
    @RabbitListener(queues = "topic1")
    @RabbitHandler
    public void process8(String topic) {
        System.err.println("通配符模式 消费者1: " + topic);
    }
    @RabbitListener(queues = "topic2")
    @RabbitHandler
    public void process9(String topic) {
        System.out.println("通配符模式 消费者2: " + topic);
    }
运行
    //通配符模式
    @Test
    public void contextLoads5() {
        senderConfig.sendToTopic("lazy.111");
        senderConfig.sendToTopic("111.orange.111");
        senderConfig.sendToTopic("1111.111.orange");
        senderConfig.sendToTopic("1111.111.rabbit");
        senderConfig.sendToTopic("1111.rabbit");
    }